
Plaster has been used for thousands of years — from the smooth walls of ancient Roman villas to the sleek interiors of modern homes. It’s the material that transforms rough brickwork into a clean, polished surface, ready for paint or decoration. But beyond its simple appearance, plaster is a fascinating blend of science and craftsmanship. Understanding what plaster is, the different types available, and how to apply and maintain it properly can make a huge difference in the durability and finish of your walls.
In this article, we’ll explore what plaster is, the main types of plaster used today, how to plaster a wall step by step, the plastering process, and how to clean and care for plastered surfaces like a professional.
What is Plaster?
Plaster is a building material made by mixing a binder (like gypsum, lime, or cement) with water to form a paste. This paste is applied to walls or ceilings to create a hard, smooth surface once it dries. It’s often used for both structural and decorative purposes—covering rough surfaces, improving aesthetics, and providing a base for paint or wallpaper.
Historically, plaster was made from lime and sand. However, modern technology has introduced several types, including gypsum, cement, and acrylic plasters, each suited for specific uses and environmental conditions.
Plaster is valued for its durability, fire resistance, acoustic insulation, and ability to create intricate designs. It can be used on both interior and exterior walls, depending on the type and finish required. However, even with all its advantages, improper mixing or application can lead to plastering problems such as cracks, flaking, or uneven finishes.
Types of Plaster
There are several types of plaster, each with unique characteristics. Here are the most common ones:
1. Gypsum Plaster
Gypsum plaster, also known as Plaster of Paris, is one of the most popular types used today. It’s made from hydrated calcium sulfate and comes as a fine white powder that hardens quickly when mixed with water.
Advantages:
- Smooth and fine finish
- Fast setting (dries in about 20–30 minutes)f
- Fire-resistant and lightweight
- Does not require curing with water
Best For: Interior walls and ceilings where a clean, polished surface is desired.
2. Cement Plaster
Cement plaster is a strong mixture of Portland cement, sand, and water, used widely for both interior and exterior surfaces.
Advantages:
- High durability and strength
- Water-resistant
- Suitable for harsh weather conditions
Best For: External walls and areas exposed to moisture.
If improperly mixed or applied too thickly, cement plaster may develop cracks—an issue easily avoided with proper technique and curing.
3. Lime Plaster
Lime plaster is one of the oldest types, made from lime, sand, and water. It has excellent flexibility and breathability, which makes it perfect for old buildings and restoration work.
Advantages:
- Prevents moisture buildup and cracking
- Eco-friendly and breathable
- Naturally antibacterial
Best For: Heritage buildings, eco-homes, or walls that require breathability.
4. Clay Plaster
Clay plaster is a natural, sustainable alternative used for eco-friendly construction. It’s made from clay, sand, and natural fibers.
Advantages:
- 100% natural and recyclable
- Regulates humidity and temperature
- Provides a rustic, aesthetic look
Best For: Sustainable homes and interior decorative finishes.
5. Acrylic or Synthetic Plaster
Acrylic plaster is a modern, ready-mixed plaster that uses synthetic resins instead of traditional binders. It provides flexibility and resistance to cracking.
Advantages:
- Pre-mixed and easy to apply
- Weatherproof and highly durable
- Available in various colors and textures
Best For: Modern exterior walls and commercial buildings.
Each type of plaster has its advantages, and companies like Pro Plaster N Paint often recommend the best type depending on your project’s surface, design, and environment.
How to Plaster a Wall
Plastering may look easy in videos, but it requires patience, precision, and the right tools. Below is a step-by-step guide to plastering a wall effectively.
Tools and Materials You’ll Need:
- Trowel and float
- Mixing bucket
- Hawk (for holding plaster)
- Plastering brush or sponge
- Plaster mix (gypsum, cement, or lime-based)
- Water and measuring tools
- Protective gloves and goggles
Step 1: Prepare the Wall Surface
Before you start, clean the wall thoroughly. Remove dust, oil, old paint, and loose material. If it’s a new wall, dampen it slightly—this prevents the wall from absorbing too much water from the plaster mix.
For smooth surfaces like concrete, apply a bonding agent or scratch coat to help the plaster adhere properly.
Step 2: Mix the Plaster
Follow the manufacturer’s instructions. Add the plaster powder gradually to clean water (never the other way around), mixing until it forms a smooth, creamy consistency. Avoid lumps, as they make plastering uneven.
For gypsum plaster, mix only what you can apply in 20–30 minutes, since it sets quickly.
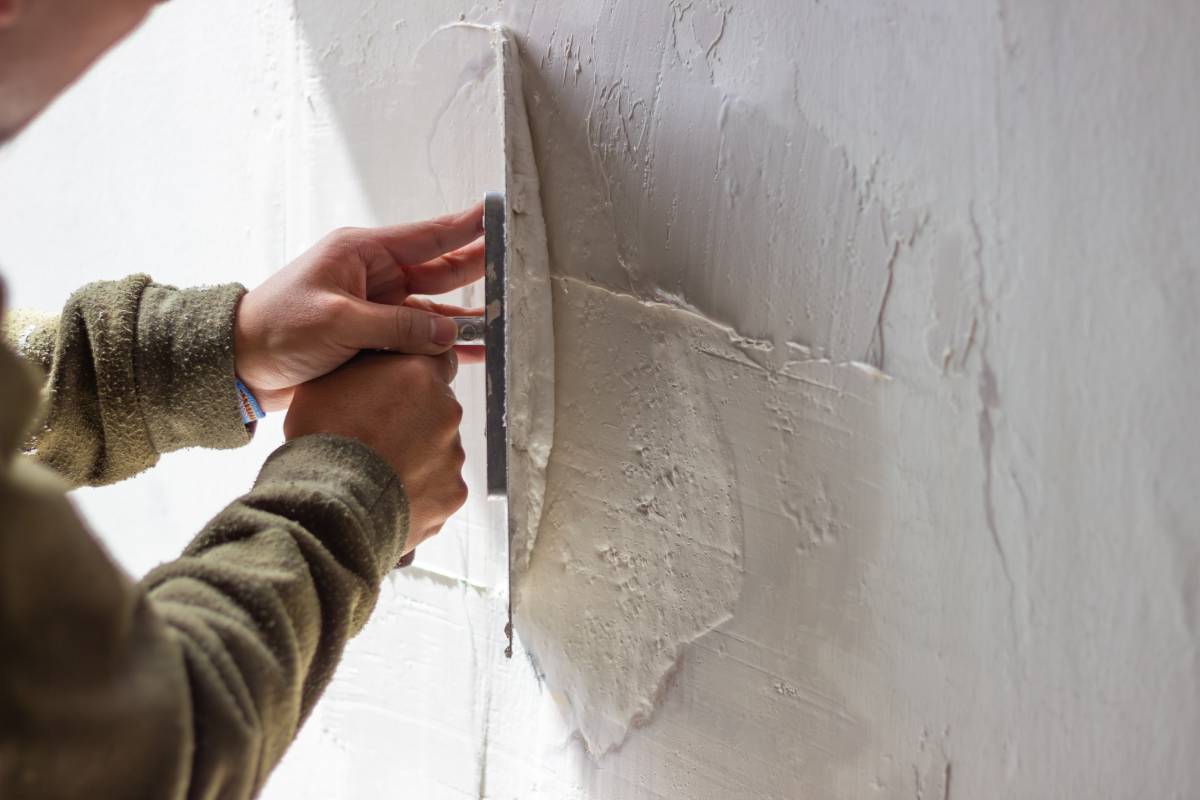
Step 3: Apply the First Coat (Base Coat)
Using a trowel, apply the plaster onto the wall in an upward motion. Spread it evenly, covering small sections at a time (around 1 m²). The base coat should be about 10–12 mm thick for internal walls.
After applying, use the straight edge or darby to level the surface and remove excess plaster. Let it set slightly but not fully harden before proceeding.
Step 4: Apply the Second Coat (Finishing Coat)
Once the first coat is firm (but still damp), apply the second coat—usually 2–3 mm thick. Use smooth, sweeping motions to achieve an even finish.
Keep your trowel clean to prevent streaks or lumps.
After spreading the second coat, use a float or sponge to smooth out the surface and eliminate imperfections.
Step 5: Final Smoothing
As the plaster begins to set (slightly firm to the touch), lightly mist the wall with water and trowel again. This process, called troweling up, gives the wall its final polished finish.
Avoid overworking the surface—too much troweling can cause plastering problems like surface cracks or uneven texture.
The Plastering Process (Step-by-Step Overview)
The plastering process can be summarized in five key stages:
- Surface Preparation – Cleaning and priming the wall.
- Application of Base Coat – The first thick layer for leveling.
- Leveling and Floating – Removing excess material and smoothing.
- Finishing Coat Application – Thin final layer for smoothness.
- Curing (for cement plaster) – Spraying water for 7–10 days to prevent cracking and ensure strength.
Professional contractors and specialists like Pro Plaster N Paint ensure every step from mixing to finishing meets high standards for long-lasting results.
How to Clean Plaster (Walls and Tools)
Keeping plaster surfaces clean maintains their appearance and longevity. Cleaning methods depend on whether the plaster is fresh (wet) or dry (hardened).
1. Cleaning Wet Plaster
If plaster spills on floors or tools before drying:
- Wipe it immediately with a damp cloth or sponge.
- Use warm water to soften any residue.
- Avoid harsh chemicals—they can damage the finish or leave stains.
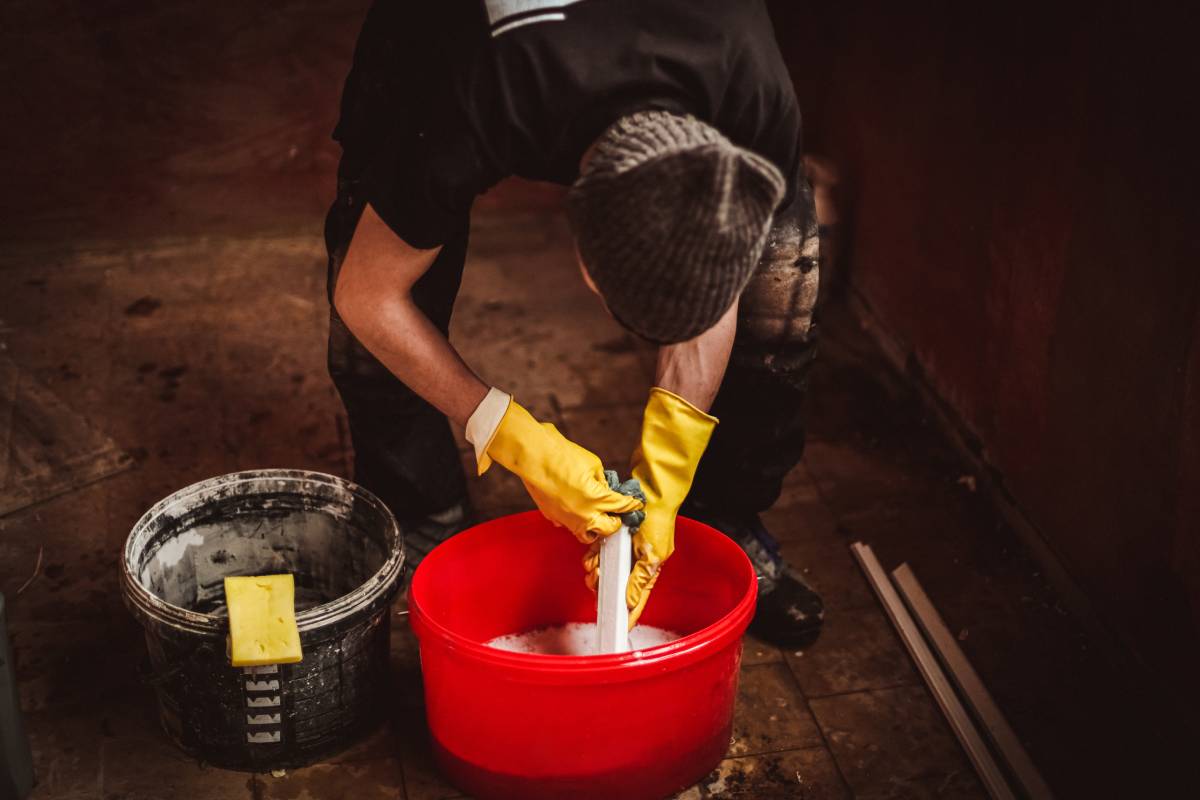
2. Cleaning Dried Plaster (on Walls or Tools)
If the plaster has hardened:
- On tools: Soak them in warm water for 20–30 minutes, then scrape gently with a putty knife or wire brush.
- On floors or tiles: Use a plastic scraper or sponge and warm water. Do not use metal scrapers on delicate surfaces.
- On walls: Mix mild soap with warm water and gently scrub using a soft cloth. Avoid excess moisture—too much water can damage plaster.
3. Cleaning Painted or Finished Plaster Walls
For regular maintenance:
- Dust regularly with a dry, soft cloth or microfiber duster.
- For light stains, use a damp sponge with a bit of dish soap.
- For tougher marks, mix baking soda with water into a paste and gently rub the area.
Avoid strong detergents, bleach, or abrasive materials as they may erode the plaster surface.
4. Preventing Damage
- Do not hang heavy objects on plaster walls without proper anchors.
- Keep humidity under control to avoid moisture absorption or cracking.
- Repair small cracks early using joint compound or filler before they spread.
- Before you paint a House, make sure your plastered surfaces are dehydrated—painting too early can trap moisture and cause peeling later.
Tips for Perfect Plastering
- Always apply plaster in thin layers for better adhesion and durability.
- Maintain a consistent mix ratio and use clean tools.
- Do not plaster on extremely hot or cold days—it affects drying and bonding.
- Keep surfaces slightly damp before plastering (especially brick walls).
- Let each layer cure properly before painting.
If you’re new to plastering, start with a small section first. For larger projects, plastering services can save time and ensure professional results.
Conclusion
Plastering combines artistry and technical skill. Whether you’re renovating an old space or finishing a new one, knowing the types of plaster, the plastering process, and how to clean plaster helps you achieve a smooth, lasting finish.
From gypsum to cement and lime plasters, each type serves a purpose based on your needs and design goals. With careful application, proper curing, and maintenance, your walls can remain durable and beautiful for decades.
Once the surface is perfected, it’s the ideal foundation to paint a House and create your right home, strong, stylish, and built to last.