
Updating your WordPress website is a job that many people find daunting, however, once your have a basic grasp of the WP backend, and how the fields related to the content are displayed on your website, you should find uploading, creating and publishing new content a breeze to deal with.
1. How to Add in Inner Page in WordPress
Creating a page in WordPress is fairly straightforward task that can take just a few minutes, depending on the content you wish to upload.
Sign into WordPress backend and navigate to the left hand side menu of the dashboard and click on ‘Pages’ – a drop down menu will appear with two options – ‘All Pages’ and ‘Add New’. Navigating to the All Pages tab will take you to a list of all current pages, choosing the Add New tab will take you directly to the Page Editor to create your new page.
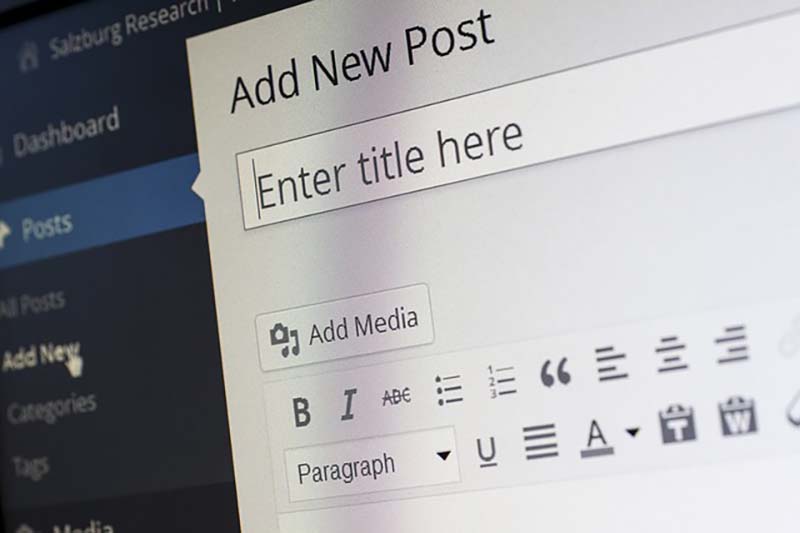
Once you have click on the Add New button, you will see the Page editor where you can begin to input the content you wish to display.
The most prominent fields for you to input data are clearly labelled. These include:
Title
This is the main page title. Note: Not to be confused with Meta Titles and H1, H2 or H3 Title Tags.
Permalink
Once you have created a title a field labelled ‘Permalink’ should appear beneath it. The permalink will be automatically generated based on the words you write in the title. However, the Permalink will effectively become part of the URL, which gives you the option to remove stop words, and include additional keywords to broaden and/or adjust your keyword density. `
Visual/Text Editor
This is the area where you input your content. There are two options, ‘Visual’ and ‘Text’. The ‘Visual’ view offers several built-in functions such as hyperlinks, headers and other formatting options that do no require any coding. The ‘Text’ view however, requires HTML coding to format and display your content as you wish.
Add Media
Here you can add media to any area of the content body. Media can include graphics, photos, and videos.
Click to read more on how to upload images to a WordPress Page >>>
Click to read more on how to upload image to a WordPress Product >>>
Add Gallery
Depending on the theme and plugins you have installed, you may see an option to insert an automated gallery of images.
Excerpt
An excerpt is additional information that can be read by Google and other search engines. To the user this field acts like a blurb or introduction to the content displayed on the page. Displaying the excerpt for your readers is optional and can be set within the theme settings.
Custom Fields
This is another field that greatly depends on plugins installed and customisation of your website. Once configured these fields can be used to add Meta data, sliders, products and whole range of other functions. As standard, it’s likely that the ‘Custom Fields’ will go unused, so be sure to read your theme documents to see if there’s a built-in function that you should be utilising.
Discussion
This is where you can turn on or off comments from your readers. As a general rule of thumb, comments should be turned off for static pages, and turned on for blog posts.
Author
This allows you to select who created the page and wrote the content. This attribution is important for any writer, as the content will then be associated with their Pen Name.
Publish
This is the area of the editor where you date and publish the page. You have the option to save the page as a draft, schedule the publishing, and set visibility to public or private. You can also backdate pages to fit inline with the creation of your website.
Page Attributes
This is where you configure the architecture of your pages. Top-level pages should be set as ‘Parent’ pages, whereas any related inner pages can be set as a ‘Child’ page, under the corresponding parent.
Here you’ll also be able to choose the page template, which may differ depending on whether you’re uploading a parent page, product page, blog page etc.
Categories
Featured Image
This is the main image that will be displayed at the very top of the page. This image will also be resized and used in place of any thumbnail images, unless your themes custom fields are configured to use a different thumbnail when required.

2. How to Add a Post in WordPress
Adding a post in WordPress is very similar to creating a Page. The main different is that posts are typically dated and in chronological order, and will be display within a parent page such as a Blog.
Most fields for adding a Post are the same as creating a Page, the most important factor here is to select the correct Parent Page from the Page Attributes drop down menu to display the post on your blog or the corresponding top level page.
Additional fields, which must be filled out, include, Categories and Tags.
Title
Enter you post Title here
Permalink
Enter your permalink URL here
Visual/Text Editor
Gives you the option to use the visual editor with built-in button formatting, or the Text editor where you manually enter HTML formatting codes.
Add Media
Select your preferred method of inserting videos and/or images.
Click to find out more about how to upload images to a WordPress Page >>>
Click to find out more about how to upload image to a WordPress Product >>>
Add Gallery
If you have a gallery installed, here you can upload multiple images to be displayed in a single gallery slider.
Excerpt
Enter your blurb or post introduction here.
Custom Fields
Depending on how your custom fileds are configured, you can enter additional SEO and page formatting here.
Discussion
Comments can be an important factor of your posts. Enable comments to encourage discussion from your readers.
Author
Select the writer responsible for creating the post and content.
Publish
Date, back date or schedule your post to be published as and when you require.
Page Attributes
Select the parent page that your posts will be displayed on.
Featured Image
Insert the main post image that will be displayed at the header image of the post, or as a thumbnail when displayed in a list of your posts.
Categories
It’s likely that your posts will cover several different categories’ that relate to your company. By assigning your posts in the correct category you can help and encourage readers to browse through related articles for more information. Post can be listed in parent categories or within Child categories under a specific top-level page.
Tags
Tags can be used to add additional information to your posts. Here you can enter terms that are related to, but not utilised within the structure of your categories, e.g. If your top level categories is Nightlife, and your Child categories include Restaurants, Bars, and Clubs, your Tags could add further information such as the Type of Cuisine (Italian, European, Thai, Fusion), the theme (Casual, High-end, Members only), or the type of music (House, Hip-hop, Electronic, Live Bands). Users can also navigate you site using Tags, which present an additional form of functionality for your readers.
Tips for Adding Pages and Posts to WordPress
Font Formats: Take into account where your headers will be displayed. Chose the best font formats for your headers fit the page layout.
Page Layout: Analyse the page layout and take a rough note of how many words will fit in the designated area of the page, create your content based around these specification.
Image Size: Resize and edit photos so they fit across both desktop and mobile platforms – theme documents will contain details on the prefer image size for your pages.
Internal links: Identify what terms can be utilized as internal links, this will create a valuable path for your readers to follow in order to view more of your online content, products and/or services.
Spell Check: As with all content, make sure the text is adequately spellchecked. WordPress has a built in Spellchecker, however it’s usually advisable to review your content on word processing software to ensure all typos and grammar mistakes are highlighted.

3. How to Add a Product in WordPress
Depending on the Ecommerce plugin or functionality within your WordPress theme you will find similar fields with which to enter your product and publish it.
Add New Product
Here you will be presented with all the necessary fields in which you can enter the details of your product.
Product details will include a Title, Permalink, Content Body Editor (Visual and Text), Excerpt, Price, SKU (Stock Keeping Unit) Categories and Tags.
The Title, Permalink, Content Editor, Excerpt and Tags work much in the same way as they do for Pages and Posts.
For Products you’ll be looking to focus on the Categories, SKU and price as listed below:
Categories:
Since it’s likely that your products and services will be related to one another, it’s important to set up the correct Category structure to allow your readers to efficiently navigate through your inventory.
Select top-level Categories that cover the broader range of your products, and then organise these sections with Child categories that related directly to the product in question.
SKU: Keeping track of your inventory is an essential part of operating your online store. Create easy to understand SKU codes so you can keep an accurate record of what you have in stock.
Price: Unlike Pages, and Post, your products will require pricing. Here you can set your RRP, and offer sales, or discounts on the purchase of multiple items.
4. How to Add an Image in WordPress
Adding images and/or videos to WordPress couldn’t be any more straightforward. And no matter whether you’re adding images and videos to Pages, Posts or Products, the process is basically the same.
Just like adding text, there are two options for you to choose from; the ‘Add Media’ function, or the ‘Text’ editor function, which requires html coding to pull the image from your media library, or CDN where your images are hosted.
Add Media:
Those who have no previous experience with HTML coding should use this option. Click on the Add Media button and you will be taken to the Media Editor where you can upload and add additional information to your images.
Choose the Image:
Upload or select your image from your library, and add the Image Attachment Details.
Input Attachment Details: This is the information associated with the image. Here you have the option to customise the image Title, Caption, Alt Text and Description. These fields directly affect your onsite SEO and should always be implemented when applicable.
Choose Thumbnail or Featured Image: When uploading images you may be given the option to select different images to be displayed as a Thumbnail, Featured Image, or Image within the content body. Typically products and posts will provide the option to upload additional Thumbnails and Featured images so they can be optimally displayed within the page layout.
Text Editor Option: If you have experience with HTML coding you can also add images from the text editor using a simple line of code. Image codes look similar to this:

However if you have no prior experience inserting images using code, then the Add Media option is the one for you.
5. How to Implement SEO in WordPress
Onsite SEO is one of the most important factors in getting your website ranked. Standard WordPress themes typically offer very little in the way of search engine optimisation, however you’ll find many great plugins that can assist you with the necessary fields to enter important Meta data that helps Google spider, read and rank your site.
One of the most popular SEO plugins for WordPress is SEO Yoast. This user-friendly plug-in provides an easy way to enter onsite SEO, and it also provides a ranking score so you can asses how effectively the title, H1, description, and alt tags you have chosen will perform.
Title
Titles are like headlines; they should immediately grab the readers’ attention with relevant keywords that read easily. Try to reduce the number of stop words such as ‘and’, ‘or’, ‘with’, and concentrate on using the most effect sentence structure that contains your most effective keywords.
H1
Another important onsite ranking factor for Google and other search engines. Adding a H1 give you an additional opportunity to elaborate on the information in your Title.
Meta Description
Meta descriptions are like blurbs for Google. They will not be displayed on the page, post or product, however they are analysed by Google and will show up as the information in search results.
Image Alt Text
Image alt text offer further optimisation on your graphics. Each image displayed on your site has the ability to include an Alt Tag. These tags are only displayed when a user hovers over the image, and within the images’ own Meta data.